Salads
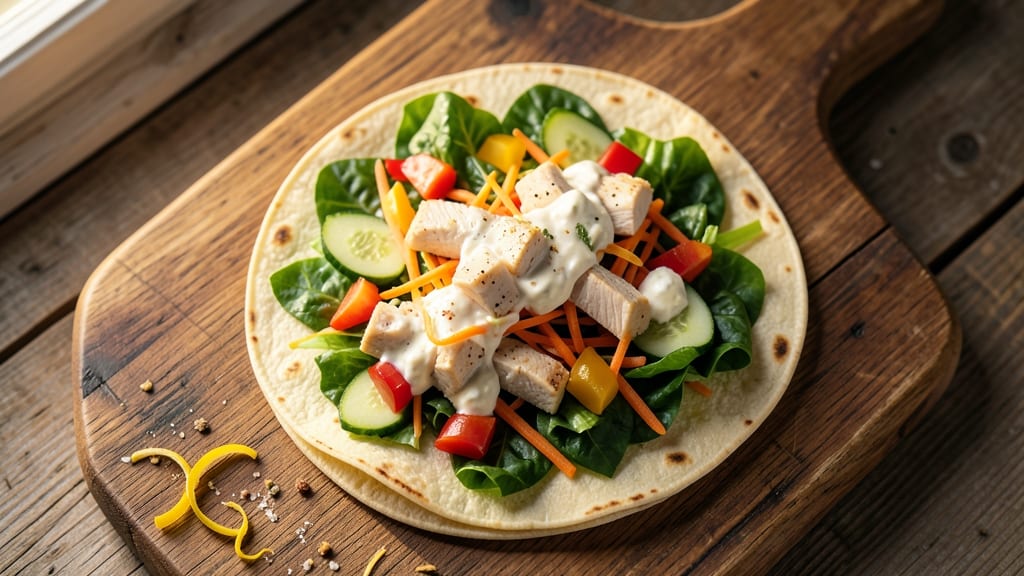
This chopped salad wrap recipe transforms fresh vegetables, protein, and dressing into no-mess, handheld meals that hide greens without sacrificing flavor. The secret lies in the proper layering technique—starting with the wettest ingredients first to prevent unraveling, then wrapping tightly for a clean bite every time.
I developed this method after years of struggling with soggy wraps that fell apart mid-bite, and it now solves that problem completely.
The beauty of these wraps is their versatility—they work cold or lightly warmed, and the filling can be customized with grilled chicken, black beans, or tofu for a plant-based option.
Large flour tortillas provide the perfect sturdy base, while a light vinaigrette or creamy dressing binds everything together without making the wrap soggy. The chopped salad approach ensures every bite has a mix of textures and flavors, from crisp vegetables to tender protein.
What you'll end up with is a restaurant-quality handheld salad that's perfect for lunch on the go, potlucks, or a quick weeknight dinner. No forks required, no mess to clean up—just a satisfying, balanced meal that tastes as good as it looks.
The wraps hold their shape beautifully, making them ideal for meal prep or packing for work. Here's how to assemble them like a pro.
This recipe also works as a great way to use up leftover proteins or garden-fresh vegetables, reducing waste while keeping meals exciting. Whether you're feeding a crowd or meal prepping for the week, these wraps deliver on both convenience and nutrition.
Let's get started with the step-by-step assembly that makes them foolproof.
Ingredients for chopped salad wrap
These fresh ingredients transform into handheld salad wraps with perfect texture and flavor balance.
| Ingredient | Amount | Notes |
|---|---|---|
| Large Flour Tortillas 🌯 | 4 whole | Burrito-size preferred for sturdy base |
| Chopped Romaine Lettuce 🥬 | 2 cups | Thinly sliced for hidden greens |
| Diced Bell Peppers 🌶️ | ½ cup | Red or green, finely chopped |
| Shredded Carrots 🥕 | ½ cup | Julienned for texture contrast |
| Diced Cucumber 🥒 | ½ cup | Seedless preferred, finely diced |
| Cooked Chicken Breast 🍗 | 1 cup | Diced, grilled or baked |
| Black Beans 🌱 | ½ cup | Rinsed, for plant-based option |
| Red Wine Vinaigrette 🍷 | ½ cup | Store-bought or homemade |
| Cream Cheese 🧀 | 4 oz | Softened for binding |
| Dried Cranberries 🍒 | ¼ cup | Chopped, for sweet contrast |
| Toasted Sunflower Seeds 🌻 | 2 tbsp | For crunchy texture |
| Salt 🧂 | ½ tsp | Kosher salt for seasoning |
| Black Pepper 🌶️ | ¼ tsp | Freshly ground for flavor |
| Lemon Juice 🍋 | 1 tbsp | Freshly squeezed for brightness |
The tortillas are the foundation—Mission brand or La Tortilla Factory hold up best to moisture. Look for large flour tortillas (10-inch) at any grocery store. For the greens, romaine is the secret weapon—it stays crisp when chopped finely. If you're using pre-shredded lettuce, skip the salt in the dressing since it's already seasoned. The chicken can be any leftover protein—grilled, baked, or even rotisserie chicken from Trader Joe's or Costco works perfectly. For plant-based versions, black beans or tofu hold up well when lightly seasoned.
No vinaigrette? Olive oil plus lemon juice and Dijon mustard makes a quick substitute. Swap cranberries for dried apricots if you prefer. The sunflower seeds can be omitted if nut allergies are a concern—pumpkin seeds work just as well. For extra protein, add diced avocado or crumbled feta cheese (if using dairy). The key to avoiding soggy wraps is draining all moisture from beans and veggies before assembling. Pat them dry with a paper towel—this step cannot be skipped. If you're meal prepping, assemble the wraps without the tortillas, then wrap them tightly in plastic wrap before adding the tortilla layer.
Store unassembled ingredients separately in airtight containers for up to 3 days. Once wrapped, keep them in the fridge for 2 days maximum. For meal prep, assemble the filling, wrap tightly in plastic, then add the tortilla layer just before eating. The wraps reheat beautifully in the microwave for 20-30 seconds if you prefer them warm. Freeze unassembled fillings for up to 1 month—just thaw and assemble fresh. The tortillas should be at room temperature when wrapping for best results, so take them out of the fridge 10 minutes before assembling.
Why You'll Love This Recipe
- Here’s what sold me: that perfect mix of crisp romaine, juicy cucumber, and the slight sweetness of raw bell peppers. No soggy lettuce here—it stays fresh and satisfying, even after sitting for a bit. Honestly, it’s the kind of texture that makes you take an extra bite.
- I’ll be real: this recipe won’t break the bank. A few tortillas, a bag of carrots, and whatever veggies are on sale—it’s a way to stretch fresh ingredients without the fuss. Plus, leftovers? Just reheat the filling (or eat it cold) and wrap again. Zero waste, all flavor.
Step-by-step instructions for chopped salad wraps
Assemble these no-mess wraps with crisp textures and hidden greens for a satisfying handheld meal.
Prepare the Cream Cheese Base
In a medium bowl, combine the 4 oz softened cream cheese with 1 tbsp lemon juice, 0.5 tsp salt, and 0.25 tsp black pepper. Mix with a fork until completely smooth and creamy. This mixture acts as the binder that holds all ingredients together without making the wraps soggy.
The lemon juice brightens the cream cheese and prevents it from tasting too rich. If the mixture seems too thick, add 1 tsp water to help spread it evenly. Keep this bowl ready for the next step—you'll want to work quickly while the tortillas stay pliable.
Layer Ingredients Strategically
Spread 2 tablespoons of the cream cheese mixture onto each of the 4 whole large flour tortillas, leaving a ½-inch border around the edges. This border prevents filling from spilling out during rolling. Divide the ingredients evenly among the tortillas for balanced flavor in each wrap.
Start with ½ cup black beans and 1 cup cooked chicken breast on each tortilla. Top with ½ cup chopped romaine lettuce, 0.5 cup diced bell peppers, 0.5 cup shredded carrots, and 0.5 cup diced cucumber. The lettuce should be spread thinly in the center—this is the "hidden greens" technique that keeps the texture crisp without making the wraps bulky.
Add Final Touches and Roll Tightly
Drizzle 2 tablespoons (about ¼ cup total) of the red wine vinaigrette evenly over each tortilla. Sprinkle with 1.5 tablespoons (half of the 2 tbsp total) toasted sunflower seeds and 0.125 cup (a quarter of the 0.25 cup total) chopped dried cranberries on each wrap. These final ingredients add crunch and sweetness that balances the savory filling.
Fold the bottom edge of each tortilla up about 1 inch, then tightly roll from the bottom up, pressing gently to seal. For a clean finish, tuck in any loose edges. If the filling feels too loose, add another 1 teaspoon of cream cheese mixture to help bind it during rolling.
Serve Immediately for Best Texture
Slice each wrap diagonally into 2-inch pieces and arrange on a serving platter. The wraps are best enjoyed right away while the tortillas remain crisp and the lettuce stays fresh. If making ahead, wrap tightly in plastic and refrigerate for up to 4 hours, but expect the tortillas to soften slightly.
Serve with additional red wine vinaigrette on the side for dipping. Each bite should deliver a perfect balance of creamy, crunchy, and fresh elements—no soggy textures or messy greens in sight. The sunflower seeds add a satisfying crackle, while the cranberries provide a subtle sweetness that cuts through the savory filling.
Pro Tips For Making Chopped Salad Wrap
- WARM THE TORTILLAS FIRST: I learned this the hard way—cold tortillas crack like brittle paper when you fold them. Pop them in a dry skillet over medium heat for 10-15 seconds per side until pliable. The wrap stays intact, and the texture’s actually better than store-bought ones.
- SALT THE LETTUCE: Fresh chopped romaine wilts into sad mush if you skip this. Toss it with ½ teaspoon salt and let it sit for 5 minutes before draining. The bitterness mellows, and the texture stays crisp—no soggy wraps here.
- DICE PEPPERS SMALL: I used to cut bell peppers into big chunks, thinking they’d look pretty. Wrong. Tiny dice (¼-inch or less) distributes flavor evenly and prevents awkward bite-sized gaps when you roll the wrap. Your mouth gets the good stuff every chew.
- WRAP TIGHT AND FAST: The moment you start rolling, your fillings will try to escape like a toddler at a birthday party. Press the edges firmly as you go, then fold the sides inward before the final roll. A quick squeeze at the end seals it—no unraveling disasters.
Essential equipment for perfect results
Tortilla Prep Tools
Start with a clean, dry work surface—I use a large cutting board or baking sheet to prevent sticking. A sharp chef's knife (like the Victorinox 8-inch) is essential for slicing tortillas cleanly if you want to make them slightly pliable before rolling.
For extra grip, keep a small bowl of water nearby to dampen your fingers slightly while handling tortillas. This prevents them from sticking to your hands.
I also recommend having parchment paper handy for easy rolling and cleanup. Simply lay the parchment on your surface, assemble the wrap on it, then roll directly onto the paper for a mess-free process.
This is especially helpful if you're making multiple wraps—it saves time and keeps your workspace tidy. 🌯
Cream Cheese Mixer
A small mixing bowl (like a Pyrex 8-inch) is perfect for combining the cream cheese mixture. Use a fork or rubber spatula to blend it smoothly—avoid electric beaters as they can make the mixture too airy.
For precise measurements, I use a kitchen scale to weigh the cream cheese for accuracy, especially if you're substituting with dairy-free alternatives like Kite Hill almond milk cream cheese.
Keep the lemon juice and spices ready in small ramekins or shot glasses for easy access. A microplane works well for fresh lemon zest if you want to add a bright garnish later. The key is having everything prepped so you can work quickly while the tortillas stay pliable. 🧀
Ingredient Prep Station
Set up a small prep station with individual bowls for each ingredient group: one for proteins (chicken or beans), one for veggies, one for seeds, and one for cranberries.
Use a mandoline slicer (like the OXO Good Grips) for even shredding of carrots and cucumbers—it saves time and ensures consistent texture. For chopping bell peppers and lettuce, a sharp pairing knife works best for precision.
I like to use small glass containers (like Mason jars) for the vinaigrette and lemon juice to keep everything organized. A fine-mesh strainer comes in handy if you need to drain excess moisture from beans or veggies.
The goal is to have all ingredients prepped and ready to layer without cross-contamination. 🥬
Rolling and Sealing Tools
A rolling pin (like the OXO Good Grips) helps press down the filling for a tight seal, but I find my hands work just as well for gentle pressure. For a clean finish, keep a small plate nearby to tuck in any loose edges.
If you're struggling with the wrap unraveling, a kitchen twine or plastic wrap can temporarily secure it while you adjust.
For serving, a sharp serrated knife (like the Mercer Culinary Genesis) gives clean diagonal cuts. I also recommend a serving platter with a lattice lid to keep wraps fresh if you're prepping ahead. The key tool here is patience—take your time rolling to ensure each bite stays intact. ✨
Nutrition facts
Frequently asked questions
Can I make these wraps without cream cheese?
Yes! For a lighter option, replace the cream cheese with 2 tbsp Greek yogurt mixed with 1 tsp lemon juice and ½ tsp Dijon mustard. This keeps the wraps creamy without being too heavy. If you prefer dairy-free, use ¼ cup hummus as a binder—just add 1 tsp water to thin it slightly for easier spreading.
How do I prevent the wraps from getting soggy?
The key is draining all moisture first—pat dry beans, veggies, and even cooked proteins with a paper towel before assembling. Also, spread the cream cheese base thinly and roll tightly from the bottom up. If your ingredients are extra wet, add an extra ½ tsp cornstarch to the filling to absorb moisture.
Can I bake these wraps instead of eating them cold?
Wrap them tightly in foil, then bake at 375°F for 10-12 minutes until the tortillas are golden and crisp. Brush with a little olive oil first for extra crunch. They reheat beautifully—just warm for 20-30 seconds in the microwave if needed. This works especially well for meal prep!
What's the best way to store leftovers?
Store unassembled ingredients separately in airtight containers for 3 days. For assembled wraps, keep them in the fridge for 2 days max, wrapped tightly in plastic. To reheat, microwave for 20 seconds (covered) or bake at 350°F for 5 minutes to refresh the tortilla. Freeze unassembled fillings only—wrap tightly and thaw overnight.
Can I use low-carb tortillas?
Yes, but expect different textures. Low-carb tortillas (like Mission Carb Balance) are thinner and crispier, so they hold up better when baked. For cold wraps, they work but may not stay as pliable. If using, add an extra 1 tbsp cream cheese per wrap to help bind the filling. The flavor remains the same—just the texture changes!